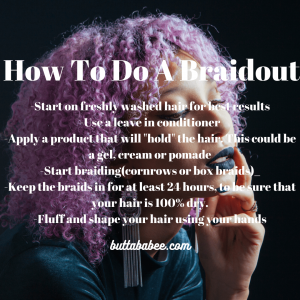
You Need Learn How To Do Breath-taking Braid Outs

How to do braid outs

How To Do Braid Outs

Who doesn’t love a good braidout?  I mean, its a style that
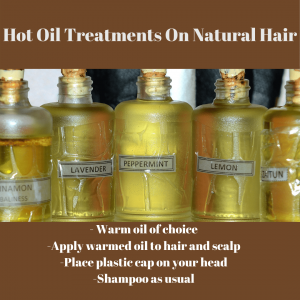
 you can literally rock with a casual or dressy outfit.  It’s so versatile, cute and  great if you are looking for a low manipulation style.  I personally do braid outs all the time on myself and Butta Babee. 

 If you search the term “braid out” on you tube you’ll find hundreds of videos of people who have had epic fails trying to accomplish this style.  In all honesty the style isn’t complicated to do, there are just a few tips and tricks you need to be successful.  The right technique and products will make a world of difference in how well your braid out turns out.  I’ll go over step by step for you to learn how to do braid outs.

How to do braid outs

Learning How To Do Braid Outs

The are a few important things to remember when you are learning how to do braid outs.  What I feel is most important is that you have to have patience.  Having patience will allow you to take your time prepping your hair properly so that the style can turn out the way you desire it to.  Planning to do this type of style in advance will avoid disappointment down the line if your braid out does not turn out the way you planned for it to.  Also, make sure you have the right products that will help you take your braid out to the next level.  So without further ado, lets get into it.

Step 1 How To Do Your Braid Out

If possible always try to do the braid out on freshly washed hair.  It is not a must but for the most part hairstyles usually turn out best on hair that is clean.  Again, this is not to say that you cannot accomplish this hairstyle on dirty hair, but fresh is best!  Wash your hair with a sulfate free shampoo.  My absolute favorite hands down is the ORS Hydrating Shampoo.  It does not dry the hair out and my hair feels nice and soft afterwards.

Step 2:

Decide what type of braids you want, when learning how to do braid outs.  Some naturals prefer to do cornrows over box braids, but it is all dependent on you.  I like to do box braids because they are easier on my arms and they don’t get tired as quickly.  One thing to keep in mind when you are learning how to do braid outs  is that the smaller the braid the tighter your braid out will look.  The bigger the braids, the larger your braid outs will look and have more fluff and wavy look when you remove the braids.

How to do braid outs

Step 3:

Once you have decided what type of braids you will do and the size, you’ll need to add in a leave in conditioner.  This leave in conditioner by Shea Moisture is the business.  It keeps my hair soft and moisturized and I love how light it feels on my hair. A leave in conditioner will help you to detangle your hair before you start braiding.  Which leads me to my next step…..

Step 4:

DETANGLE!!! Yes, its that serious.  There is no way you’ll be able to achieve the best braid out you’ve ever seen if your hair is not detangled and smoothed out before you start to style it.  Detangling is important for a number of reasons.  First, it gives you a smooth canvas to work with and it will stop you from losing excess amounts of hair.   Secondly, fly-a-ways are a thing and if your hair isn’t detangled it will show when it is time for you to remove the braids.  Take a few extra minutes to detangle, your hair will look that much better in the end.

How to do braid outs

Step 5:

Begin Braiding! Take your time on this step, don’t rush. You want your braids to be neat. For this step you will want to use to type of gel, pomade or cream for “hold”.  The Mane Choice has an amazing 24k twisting gel, that i swear by.  You can grab yours here.  At this point I don’t think I will ever use anything else when I am doing my twist and braid outs.  Why not you ask?!! because the definition that this product provides is out of this world. I love that it does not flake or make my hair hard. 

Step 6:

Allow time for the products to dry and set in your hair.  To be on the safe side, I would say to give it at least 24 hours.  Unraveling the braids too early and while they are wet will leave you with a huge frizzy mess.  This is a lesson I’ve had to learn the hard way many times because I was impatient.  Don’t do this, I promise you, you’ll be pissed if you do. After you unravel the braids, you should have a crimped looked with beautiful definition and now you can move on to the final step.

How to do braid outs

Step 7:

Now that you have removed the braids it is time to fluff and separate the hair.  Take care not to over manipulate the hair, which can cause frizz.  Gently separate and pull apart the hair sections in 2 with your fingers and use a wide tooth comb  or pic. Use the comb to fluff/lift the roots of your hair a bit to make the style look more full. I hope that this was a helpful guide on how to do braid outs.